I'm trying several things in the dehydrator today: pears, apples, green beans, sweet potatoes.
Apples and Pears: Core, cut some with and some without skin. Store cored fruit in lemon water. Cut ~1/8" thick. Sprinkle with cinnamon (next time try brushing with some vanilla, then sprinkle with cinnamon). Dry at 135 F for 7 hours. Turned over at 4 1/2 hours. A bit rubbery, but almost done. Too thin, though, curling up like a bit.
Green beans: chop off ends, mix with 1 t. sunflower oil, sprinkle with salt. Dry at 135 F for 8.5 hours.
Sweet potatoes: sliced 1/8", to 1/2 sprinkled with cinnamon, to 1/2 coated with sunflower oil and sprinkled with sea salt.
Overall, disappointed that they aren't crispier.
Monday, March 29, 2010
Friday, March 26, 2010
Processing the almonds to make almond milk
1. Soak the almonds overnight in water in the frig.
2. Rinse well in running tap water over a colander
3. Process the almonds (do 1 cup of almonds at a time)


2. Rinse well in running tap water over a colander
3. Process the almonds (do 1 cup of almonds at a time)
- Place almonds in blender
- Add 2 cups of water
- Blend on high for 1-2 minutes until well blended

- Pour the almond mix into a prepared strainer. Allow it to drain until no more will drain. I put a strainer over a 4 cup measuring cup. Over the strainer I place cheese cloth. I cut 2 strips of cheesecloth that are about 1 foot long each. I crisscross them over each other (so the make an 'X') on the strainer

- Once no more will drain, gather up the cheesecloth and squeeze it until you can't squeeze any more milk out. Be careful or the almonds will come out the top.

- Pour the almond milk from the measuring cup into your pitcher, put the strained almond pulp in the cheesecloth into a bowl for use in other recipes.

Squeezed almond pulp
- Repeat with remaining almonds

Mmmm...almond milk, yum!
Almond Pulp Prep - #2
I posted previously how to dry the almond pulp by drying it in the oven. Unfortunately, the oven "kills" the almonds, so it is no longer considered raw. Raw almonds maintain their enzymes and other nutrients. However, I had no other way of doing it besides the air (which would take too long) so it worked in the meantime. NOW, I have a dehydrator (yay!) so I'm drying it in the dehydrator. I spread it out on the trays lined with sheets.
When it's dry, it looks like this (this was actually dried in the oven):

After sifting it, the sifted almond pulp looks like this:

Not everything will go through the sifter, mostly the skins, so you are left with this:
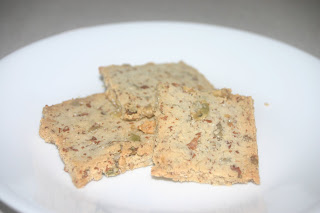
 So far all I've tried to make with the almond pulp are CocoNutty crackers. We really like them, but we are still perfecting the recipe.
When it's dry, it looks like this (this was actually dried in the oven):

After sifting it, the sifted almond pulp looks like this:

Not everything will go through the sifter, mostly the skins, so you are left with this:

CocoNutty Crackers
CocoNutty Crackers
2 t. chia seeds + 4 oz water
1 ½ cup sifted almond pulp (leftover from making almond milk)
½ cup coconut flour
½ cup sunflower seeds (raw)
½ cup pumpkin seeds (raw), grind in Burr grinder (coarse)
½ t sea salt
4 T coconut oil, melted
6 T water
- Add the 4 oz of water to 2 t of chia seeds (make sure they are food grade). Allow to sit until thickened. This acts as an egg substitute.
- Mix all dry ingredients together.
- Mix in chia seeds.
- Mix in oil.
- Mix in water 1 T at a time. You want enough until you can form a ball.
- Roll out on to cookie sheet. I put a silicone mat on my cookie sheet, shaped the dough into a log, placed wax paper on top and rolled it out to 1/8 – ¼ inch thick. The problem with the silicone is that it buckles, making the crackers bent.
- Sprinkle tops with salt.
- To ½ the batch I baked at 325 F 30 minutes until lightly browned. After 20 minutes, flip over, cook another 10 minutes.
- I dried the other ½ of the batch in the dehydrator for 13 hours. Not too bad, but definitely need more salt.
My "New" Dehydrator!
I've been on the search for a dehydrator for a couple of months now. I finally found one on Craigslist and I'm pretty excited. It's a 9 tray 2900 Excalibur. It's the older model, but it looks brand new! I wonder if she even used it :o) She also included a bunch of Teflexx (?) sheets for making fruit leather and stuff that doesn't work on the mesh sheets. I'm not too excited that they are made of Teflon, but it will work for now. I just loaded up my first batch. Since I just made almond milk, I loaded it up with the almond pulp. I also made some CocoNutty crackers so I'm drying 1/2 the batch instead of cooking to see how it turns out.


The Excalibur 2900

Loaded up with almond pulp on the teflon sheets -- Very thin layer, took about 4 hours to dry
Coco Almond Milk
I've been having a lot of trouble with the coconut oil precipitating (for lack of better term!) out of the almond milk. I've been using 4 t of coconut oil per 8 cups of almond milk. I'm using 16 soy lecithin capsules (poking them open and draining into the milk) as my emulsifier. I've seen a recipe that called for using lecithin granules, so I broke down and bought some. Here's what I tried, waiting for it to get cold to see if it works:

CocoAlmond Milk
4 cups of soaked almonds (start with 3 cups dry and soak overnight in frig)
8 cups of water
2 t vanilla
4 T agave nectar
2 quick shakes of salt
1 1/2 T. lecithin granules (well actually, added 2 t. first and then another 1 1/2 t later, blended it on low for a bit til all incorporated)
2 t. coconut oil. mine was liquidy at room temp.
- Process the almonds.
- Pour some of the almond milk back into the blender (be sure to rinse the blender first to clean out remaining almond bits).
- Add vanilla, agave nectar, salt and lecithin granules. Blend well until granules are dissolved.
- Gradually add coconut oil.
Wednesday, February 24, 2010
More sprouts!

The sprouting Jar -- kept on its side so the grains get more air
Last night (Tues) I started some more sprouts. This time I'm trying oat groats and buckwheat groats. I'm so glad I found these instructions before I started. You're only supposed to soak them for 20-30 minutes because otherwise they get water logged and won't sprout. I was going to soak them overnight, whew! The other important thing about these is that you have to rinse the water until it runs clear or they won't sprout. This morning, my buckwheat groats are already sprouting a bit. I'll "harvest" them tonight.
Sprouts in Action!
These are buckwheat groats. You can see a tiny white bud coming off the pointy end.
Tuesday, February 23, 2010
What to do with the almond pulp?
It's seems like a shame it get rid of the almonds leftover from making almond milk, so I've been experimenting with ways to use it. But first, this is what I do with it:
1. After the all the almond juice has been squeezed out, I spread the almond pulp out on to cookie sheets, try not to have more than 1/2 inch or so.
2. Place in 170 F oven until dry. About every 1/2 hour, I gather it all into the center of the cookie sheet with a spatula and mix it a bit then spread it back out to ensure it all dries relatively evenly.
3. Place in a container and store in the frig.
If I'm going to use it in a recipe, I sift it first, most of it will go through, but there will be some bits left, probably. I learned the hard way not to try to grind it in a coffee grinder, it turns to almond butter and clogs the grinder! Aaaggghhh!
Nutty Cracker - Take 2
Nutty Crackers – Take 2

1 t. chia seeds, ground + 2T water
1 1/2 cups sifted almond pulp (leftover from making almond milk)
½ cup dried almond pulp (leftover from making almond milk)
1/3 cup sunflower seeds (raw), coarsely chopped
1/3 cup pumpkin seeds (raw), coarsely chopped
½ t sea salt
4 T coconut oil, melted
4-6 T water
- Add the 2 T of water to 1 t of ground chia seeds (make sure they are food grade). Allow to sit until thickened. This acts as an egg substitute.
- Mix all dry ingredients together.
- Mix in chia seeds.
- Mix in oil.
- Mix in water 1 T at a time. You want enough until you can form a ball.
- Roll out on to cookie sheet. I put a silicone mat on my cookie sheet, shaped the dough into a log, placed wax paper on top and rolled it out to 1/8 – ¼ inch thick. I sprinkled just a bit of fine sea salt over the top.
- Bake at 350 F 20-30 minutes until lightly browned.
The dough is still a bit crumbly and difficult to handle, perhaps another teaspoon of chia seeds next time.
Here's what I tried the first time.
Here's what I tried the first time.
Citrus Juice
I'm a little behind in posting! This past weekend we had guests and I know they like orange juice, so I wanted to make some fresh squeezed citrus juice for them, something I had at another friend's house about a month ago. For some reason, though, mine is quite a bit different. It turned out pretty good anyway! This is what I did.
Citrus Juice
3 Pink Grapefruits, squeezed
2 Lemons, squeezed
3 Limes, squeezed
6 oranges, squeezed
9 T agave nectar
6 packages of stevia (PureVia brand)
Mix it all together in a pitcher. I added a little bit of the orange pulp to add a little fiber and because I like it!
It's a bit too grapefruity. I think next time I would only use 2 grapefruits. I'm sure the 9 T of agave measures out better somehow, but I was adding 1 T at a time to taste.
Saturday, February 20, 2010
Price comparisons
Yesterday, Carlos and I (sans Kira who was off with Papa and Mimi for the weekend) went to Tijuana Flats over by USF and got a Carnitas chimichanga and chips and queso...yummy! We'd never had the carnitas version before and really loved it, definitely our favorite! We had a great time being just the 2 of us. It reminded us of when I was pregnant with Kira, we were both working at home and could just get up and go whenever we want. It was one of the best times of our marriage.
After lunch we went to Abbey's Health and Nutrition and Whole Foods to check out their prices and compare them to Chuck's and Nutrition S'Mart that we checked out last week. Overall, My favorite place is definitely Whole Foods. They have the best selection, the best produce, a cafe, yummy samples. However, the best prices are generally at Nutrition S'Mart. Abbey's was good, they had stuff there that I hadn't seen elsewhere. I've heard from others that they are very knowledgeable. Chuck's is ok too, but their produce is generally the worst and it "feels" messier than the others. For us, Chuck's is the most conveniently located and a great thing about them is that they have 20-50% off everything in the store on Super Tuesday, which is the second Tuesday of the month. The price savings otherwise, though, definitely warrant an occasional trip to Nutrition S'Mart.
There were some snacks at Whole Foods that I definitely want to try. I can't wait! They were generally a mix of different seeds (flax, sunflower, pumpkin) and fruits (dates, raisins). I will post my experiments as I try them.
Almond Milk - Take 3
I found a recipe for Brazil nut milk, so I thought I would adapt it to almond milk since I have almonds and no Brazil nuts (which, by the way, are good for the alkaline diet, too). So far this is definitely my favorite. I made a lot (total of 6 cups, fills up my pitcher, but I tried to add ingredients so that the amount is divisible by 4, you'll have to adjust a bit if you make less). I call it Coco Almond milk, but the coconut flavor is barely there.
Coco Almond Milk
4 cups of soaked almonds (probably about 3 to 3 1/2 cups dry)
4 cups of water
2 T amber agave nectar
1 1/2 t vanilla extract
about 3 dashes of sea salt
3 capsules of soy lecithin (520 mg each)*
2 t coconut oil
1. Soak the almonds overnight in water in the frig.
2. Rinse well in running tap water over a colander
3. Process the almonds (do 1 cup of almonds at a time)
5. Pour 2 cups of almond milk back into blender (rinse blender well first to remove almond bits).
The following is not the order I did it because of a minor disaster I had (see * below), but is what I intend to do next time:
6. Add agave nectar, vanilla extract, sea salt and soy lecithin. Mix well on high.
7. Add coconut oil, 1/2 t. at a time. Mix well on high (I think!)
8. Pour mix in blender into pitcher and stir. Hopefully, it's all blended, still working out the kinks of mixing in the coconut milk.
* The original recipe calls for adding lecithin powder, which I didn't have, so I tried without it....BIG MISTAKE! After mixing everything together, the coconut oil was a big glob on the top of my almond milk, yuck! As my background in chem teaches me (duh!) oil and aqueous solutions, don't mix! Lecithin is an emulsifier, meaning it enables water and oil to create a homogeneous mixture. We don't have the powder, but my dear hubby did have capsules in the cupboard for cooking purposes. So I added those one at a time until the coconut oil was mostly mixed in. Next time, I will add the lecithin to the aqueous solution first to make sure it's well mixed and then add the coconut oil a bit at a time so ensure I don't overwhelm the mixture. Hopefully, that will be more successful.
This recipe makes a good base for smoothies, to put in cereal, etc. For just a plain ole yummy glass of "milk", you might want to jazz it up a bit. Carlos made a yummy concoction. He added 1/4 t vanilla and 1 t agave nectar to about 8 oz, yum, yum, yummy!
**I actually took pictures this time so you can see what I do! When I strain the almond mix the separate the milk from the pulp, I put 4 layers of cheese cloth over a strainer which is sitting on a 4 cup measuring cup (LOVE that measuring cup, very handy!)


Coco Almond Milk
4 cups of soaked almonds (probably about 3 to 3 1/2 cups dry)
4 cups of water
2 T amber agave nectar
1 1/2 t vanilla extract
about 3 dashes of sea salt
3 capsules of soy lecithin (520 mg each)*
2 t coconut oil
1. Soak the almonds overnight in water in the frig.
2. Rinse well in running tap water over a colander
3. Process the almonds (do 1 cup of almonds at a time)
- Place almonds in blender
- Add 1 cup of water
- Blend on high for 1-2 minutes until well blended
- Strain the almond mixture**
- Pour the almond milk into your pitcher, put the strained almond pulp in a bowl for use in other recipes. See here for what to do with it.
- Repeat with remaining almonds
- I rinse out the remaining bit of almonds in the blender with the almond milk I've already strained and strain it again.
5. Pour 2 cups of almond milk back into blender (rinse blender well first to remove almond bits).
The following is not the order I did it because of a minor disaster I had (see * below), but is what I intend to do next time:
6. Add agave nectar, vanilla extract, sea salt and soy lecithin. Mix well on high.
7. Add coconut oil, 1/2 t. at a time. Mix well on high (I think!)
8. Pour mix in blender into pitcher and stir. Hopefully, it's all blended, still working out the kinks of mixing in the coconut milk.
* The original recipe calls for adding lecithin powder, which I didn't have, so I tried without it....BIG MISTAKE! After mixing everything together, the coconut oil was a big glob on the top of my almond milk, yuck! As my background in chem teaches me (duh!) oil and aqueous solutions, don't mix! Lecithin is an emulsifier, meaning it enables water and oil to create a homogeneous mixture. We don't have the powder, but my dear hubby did have capsules in the cupboard for cooking purposes. So I added those one at a time until the coconut oil was mostly mixed in. Next time, I will add the lecithin to the aqueous solution first to make sure it's well mixed and then add the coconut oil a bit at a time so ensure I don't overwhelm the mixture. Hopefully, that will be more successful.
This recipe makes a good base for smoothies, to put in cereal, etc. For just a plain ole yummy glass of "milk", you might want to jazz it up a bit. Carlos made a yummy concoction. He added 1/4 t vanilla and 1 t agave nectar to about 8 oz, yum, yum, yummy!
**I actually took pictures this time so you can see what I do! When I strain the almond mix the separate the milk from the pulp, I put 4 layers of cheese cloth over a strainer which is sitting on a 4 cup measuring cup (LOVE that measuring cup, very handy!)

Blending the almonds

Straining the almonds

Getting ready to squeeze out the milk

Thursday, February 18, 2010
Chickpea Sesame Crackers
Today Kira and I made sesame crackers using chickpea flour (besan) using this recipe (gotta scroll to the bottom), but modified a bit because I didn't have all of the ingredients. You can buy chickpea flour, but I chose to make it instead. I bought dried chickpeas and ground them in a small food processor as much as I could (it was really loud and took a long time to grind). I seemed to have a hard time getting it into flour texture, but I was able to get enough to experiment with by sifting it. The remaining bits are about 5 mm or less; I'm going to try grinding them in a coffee/spice grinder and/or grain mill, when I get one or the other.
I also used almond flour using the leftover almond pulp from making almond milk the other day. I had already dried the pulp in a 170 degree oven and stored it in the frig. Before using it in the cracker recipe, I sifted it. Here's what we tried:
Chickpea Sesame Crackers
1/4 cup chickpea flour
1/4 cup almond flour
1/4 t salt
1 T toasted sesame seed, lightly ground
1 t toasted sesame seeds
1/4 t soybean oil
about 3 T water (add water until it forms a ball)
1. Mix all the dry ingredients well.
2. Mix in oil.
3. Mix in water 1 T at a time.
4. Knead the dough well to mix all the ingredients.
5. Wrap in plastic wrap and set aside to rest for 10 minutes. Meanwhile, preheat oven to 350 F.
6. After resting, roll out. I put it on a silicone mat, put wax paper on top and rolled with a rolling pin.
7. Cut into the shape you want.
8. Poke each with a fork.
9. Bake 15-20 minutes.
They taste pretty good, but there is an after taste that I can't identify....
Wednesday, February 17, 2010
I Have Sprouts!
On my last major shopping trip, I purchased 2 sprouting jars. So, I decided to start the project on Monday (today is Wed)
http://thehealthyhomeeconomist.blogspot.com/2009/06/how-to-make-sprouted-flour-at-home.html
http://www.ezhealthydiet.com/sprouts.html
I'm going to try making the flour in a spice grinder, I can't wait to get a grain mill. We plan to get the attachment for out Kitchen Aid. It's a bit pricey, so I'm gonna sell some stuff to earn some money to get it.
- Monday night, I started soaking about 1 cup of white wheat berries in each jar. I filled the jar up with water and let it soak overnight.
- Yesterday morning, I rinsed thoroughly under running tap water for at least 30 seconds. Then I drained them for a couple of minutes, letting them sit upside down.
- Around 3, I rinsed and drained them again.
- By 6 or 7ish, I saw teeny, tiny white buds coming of the tips of most! I couldn't believe it happened so fast! I rinsed them again, drained and let sit overnight.
- By this morning there was a bud coming off most, if not all the wheat berries. So, I laid them all out out on 2 cookie sheets an put them in a 170 degree oven to dry (I can't wait to get a dehydrator! I think the oven is too hot, I think it destroys some of the nutrients.)
http://thehealthyhomeeconomist.blogspot.com/2009/06/how-to-make-sprouted-flour-at-home.html
http://www.ezhealthydiet.com/sprouts.html
I'm going to try making the flour in a spice grinder, I can't wait to get a grain mill. We plan to get the attachment for out Kitchen Aid. It's a bit pricey, so I'm gonna sell some stuff to earn some money to get it.
Tuesday, February 16, 2010
Almond Milk - Take 2
I made some more Almond Milk yesterday. I think it turned out a bit better. It was a little thicker, more like milk. This time:
Almond Milk
1. Soak 2 cups of almonds in water overnight in the frig.
2. The next day, rinse well with fresh water.
3. Put 1 cup of almonds in blender, add 1 cup of water. Blend until it's as smooth as you can get it.
4. Drain "milk" from almonds. I use a strainer covered with cheesecloth, although I hope to get a nut bag sometime soon, hopefully, it will be less messy. Set aside nut pulp.
5. Repeat with remaining almonds.
6. Add 1/2 t. vanilla extract.
I noticed that it smells a bit sour, not sure if that's normal, but it seems to taste ok. I saw a recipe in which someone added dates, I guess to sweeten. I think I might try that.
With the leftover almond pulp, I dried it in a 170 degree F oven. I'm not sure how long it was since Carlos took over for me. I put it in an airtight container and stored it in the frig.
Friday, February 12, 2010
Almond Milk and Nutty Crackers
This afternoon I made some almond milk. (Click here for some nice step-by-step instructions with extra ingredients and pictures):
Almond Milk
I've been wanting to make my own crackers so they have fewer carbs, no wheat and no preservatives. I found a few recipes that use almond flour, so I thought I would use the almonds left over from making almond milk. I tried it without drying it. From the recipe above I had about 2 cups of almonds total. This is the recipe I tried:
Nutty Crackers, take 1
1 1/2 cups of almond "paste" (not sure what to call it!)
1/2 t sea salt
2 T soybean oil
3 T coconut oil
1/4 c coarsely crushed pumpkin seeds
1/4 c coarsely crushed sunflower seeds
Roll out to about 1/8" - 1/4". I rolled them out on a flat cookie sheet covered with a silicone mat. I put wax paper on top and rolled with a rolling pin. (Do not make the mistake of thinking you can do it without the wax paper, it sticks!) Bake at 350 degrees, 20-30 minutes or until golden brown.
I like them! They are rather tasty, but a bit greasy. They could probably use just a touch more salt.
I had a hard time getting everything to bind. I'm a bit concerned with all the fat and I'd like to try to get some protein in there. I'm thinking I might try a little bit of protein powder added in next time. I have no idea of the chemistry of cooking, so I have no idea how that will work.
I based my recipe on a couple recipes. The first was the Rosemary Fig Crackers Recipe without the rosemary, figs and egg (I didn't have any eggs). Noticed a couple others that used no eggs (Chickpea Crackers and Sesame Crackers and Gluten-Free Herb Crackers) that seemed to use extra oil.
Almond Milk
- 1 1/2 cups of almonds soaked in water overnight in the frig. Be sure to add a couple of inches of water over the almonds because my almonds soaked up so much that they were a bit uncovered this morning. This will result in about 2 cups of soaked almonds.
- Drain water, rinse a couple times with fresh water.
- Put in blender 1 cup of almonds, 2 cups of water. Blend until as smooth as you can get it.
- Drain the "milk" from the almonds. I used cheesecloth (4 layers) over a strainer. Reserve almonds.
- Repeat steps 3 and 4 with remaining almonds.
I've been wanting to make my own crackers so they have fewer carbs, no wheat and no preservatives. I found a few recipes that use almond flour, so I thought I would use the almonds left over from making almond milk. I tried it without drying it. From the recipe above I had about 2 cups of almonds total. This is the recipe I tried:
Nutty Crackers, take 1
1 1/2 cups of almond "paste" (not sure what to call it!)
1/2 t sea salt
2 T soybean oil
3 T coconut oil
1/4 c coarsely crushed pumpkin seeds
1/4 c coarsely crushed sunflower seeds
Roll out to about 1/8" - 1/4". I rolled them out on a flat cookie sheet covered with a silicone mat. I put wax paper on top and rolled with a rolling pin. (Do not make the mistake of thinking you can do it without the wax paper, it sticks!) Bake at 350 degrees, 20-30 minutes or until golden brown.
I like them! They are rather tasty, but a bit greasy. They could probably use just a touch more salt.
I had a hard time getting everything to bind. I'm a bit concerned with all the fat and I'd like to try to get some protein in there. I'm thinking I might try a little bit of protein powder added in next time. I have no idea of the chemistry of cooking, so I have no idea how that will work.
I based my recipe on a couple recipes. The first was the Rosemary Fig Crackers Recipe without the rosemary, figs and egg (I didn't have any eggs). Noticed a couple others that used no eggs (Chickpea Crackers and Sesame Crackers and Gluten-Free Herb Crackers) that seemed to use extra oil.
"Unique" smoothie
So Carlos was cooking and I needed something quick and easy. He creates these disgusting concoctions, just to get the "stuff" he wants and needs and chokes it down. I can't do that! However, I was a bit desperate so I did try something. I drank it again this morning, it's not super yummy, but I can drink it and it has good stuff. I made a:
Kefir smoothie
4 oz Kefir, plain, unsweetened (I buy it at Publix)
1/2 scoop protein powder
2 T. Chia seeds
squirt of Agave (probably about 2 t)
Kefir is really thick, so I diluted to about 10 oz. with alkaline water
I put it all in a shaker cup and shake, shake, shake!
Chia is a bit gritty/chunky, but it's a texture I can deal with.
Thursday, February 11, 2010
Major Shopping Trip
So on Tues we decided to do some price comparison between Chuck's Natural Food Marketplace and Nutrition S'mart (the most conveniently located health food stores for us, although they are quite far away, so it was an all day experience). On some other day, we will also check out Wild Oats and Abbey's. We chose that day primarily because it was super Tuesday at Chuck's where everything is 20% of (second Tues of the month). We found that for the most part Nutrition S'mart was cheaper. I didn't figure in the 20% off because we were exhausted by that point!
I must admit, I was overwhelmed, I couldn't think. For some reason, I'm kinda stuck on wanting to sprout grains, I guess I'm excited about the project and I want to try making bread and crackers and other fun stuff with it. Beyond that, I couldn't figure out what to buy, I was just sorta circling the store. I did have recipes, but I guess cost overwhelms me so I can't make a decision, so Carlos stepped in and helped me! We bought fresh veggies, coconut oil, lotsa almond (for making almond milk, almond butter, almond meal), sunflower seeds, pumpkin seeds, wheat berries, oat groats, buckwheat groats, mung beans, a couple of sprouting jars, some alkaline water and some other things I can't remember at the moment. As we were driving home, it was getting kinda late, we were tired and Kira spots miraculously a Cici's Pizza with a small sign tucked in amongst a bunch of other stores! Amazing! We stopped and suffered later! I'm not even sure it was worth the agony.
I realized that I can't start my project yet, though because we are going away for the weekend and it takes a few days to do the whole sprouting thing. So I'm waiting to start until Sun. night. There are a bunch of How-To's online, I'm gonna go with this one: http://www.ezhealthydiet.com/sprouts.html We'll see how it works.
I did try a pretty yummy smoothie yesterday. I think it's pretty alkaline, although I used all frozen fruits/veggies, so I'm not sure. This also fits in well with the Zone diet, so I was pretty happy with it. Initially, the taste wasn't too exciting, but by the time I was done, I really enjoyed it.
1 cup Mixed berries, frozen
1/3 - 1/2 banana, to taste
1/2 cup kefir (bought at Publix)
1/3 box Spinach, frozen
water, add as needed
--Mix in blender until smooth. I had to add probably close to 1 cup of water.
--Blend in:
1/2 scoop soy protein powder, unflavored (see note below)
2 T. Chia seeds, ground
This has approx. 28 g net carbs (45 g carb, 17 g fiber), 24 g protein, 5.5 g fat
NOTE: In the future, I do not intend to use soy protein. It's what I have on hand, so I'm going to use it up, but I'm concerned about some potential negative health effects it is reported to have. I'm going to use either whey protein or a soy-free veggie protein powder.
In the future, I hope to start making my own Kefir, it sounds fun! Again, lotsa sites online to tell you how to do that, when I get to it, I'll explain more. Kefir is basically fermented milk, kinda like yogurt. It has lots of nutritional benefits. At Nutrition S'mart I saw coconut milk kefir, which I may try. Otherwise, I hope to be able to make it with fresh, unpasteurized goat's milk. We'll see how that goes!
Tuesday, February 2, 2010
Getting Started
I'm kinda having a hard time starting. I'm feeling quite challenged to get protein that isn't from animals. I eat mostly cottage cheese (a controversially alkaline food), although tonight we ate some turkey sausage. There's so much food in our house that is non-diet friendly and lot that is diet-friendly but not alkaline diet friendly. We've decided we are going to give a lot of it away, rather than just toss it. I've been enjoying figs, an excellent alkaline food! I think Kira might like them too, a great bonus! I found a cereal at Publix that is made from sprouted grains (sprouting the grains makes them alkaline), so I'm hoping it's alkaline. (I wish I knew how I could test food to determine the pH of its ash.) It tastes a bit like cardboard, but I added cinnamon (which is great for moderating the effects of carbs on your insulin) and stevia and I actually enjoy it! Today I made an alkaline dish (I think) that tasted pretty good, Carlos said it's ok, Kira gobbled it up:
Sweet Potato Apple Yummy
1 lb of sweet potatoes, chopped up into bite sized pieces
2 small Red Delicious apples (recipe called for Granny Smith), chopped up into bite sized pieces
1/2 t. cinnamon
1 1/2 T butter
1/2 t. salt
3/4 T light (colored) agave nectar
Mix all together in microwave safe bowl (I think mine was 2 qt). Microwave 5 minutes. Mix. Microwave another 3-5 minutes until sweet potatoes are soft.
I calculated the Nutrition Info to be approximately:
serving size 3 oz (8-9 servings total)
75 kcal
1 g protein
16.5 g carb
2.25 g fiber
1.8 g fat
Poor Carlos really suffered yesterday. He has been pretty good about drinking water with baking soda and trying to stay alkaline for about a week now. Sunday we celebrated mine and my aunt's birthday with family. We had roast beef, mashed potatoes, candied carrots, cake, ice cream (all yummy and acidic). He reacted very badly. If I hadn't been fine he would have thought he had food poisoning. He's better today, but it took at least 24 hours for him to feel better. This is the guy that can eat food that's been in the frig for 2 months with no problem....
Saturday, January 30, 2010
Why we are doing it?
Carlos, my husband, and I had great success with the Zone diet several years ago. We both lost about 65 lbs each. I stayed on it while pregnant by increasing my calories and had an amazing pregnancy. My blood pressure went down, my plantar fasciitis when away, I didn't swell.... However, we have slowly gotten away from it. We want to get back to it because we felt so good and healthy.
In addition, we were recently introduced to the Alkaline Diet and are hoping to be able to successfully incorporate both the Alkaline Diet and the Zone Diet into our lives. We hope/plan to make this a lifestyle change, not just a temporary fix to our current state of health.
The Zone Diet has gotten some flack because it became popular around the same time as the Atkins Diet and so was labeled a low carb diet. However, that is not quite true. It IS a lower carb diet, but there are carbs included balanced with protein and fat. It was developed by a biochemist named Dr. Barry Sears. It may seem a bit overwhelming and complicated at first, but it is really easy once you get the hang of it. We started with a book called A Week in the Zone that breaks down the science behind the diet and gives basic guidelines for getting started. It's a quick and easy read and I highly recommend it.
We have recently been introduced to the Alkaline Diet. I'm interested and excited about it because it seems to be the way to go to avoid health problems. Cancer cells and microbes (bacteria, viruses, fungi, worms, etc.) thrive in an acidic environment. Just about everything we eat today has an acidifying affect on our bodies....grains (bread, pasta, pancakes...), meat, sugary stuff, fast food, coffee, black tea, the list goes on...I'm still learning, I don't know much, but I will pass along what I learn. There are many, many websites with info, I found this one to be pretty good: http://nh1.ccone.com/alkdiet.html
There are also many, many, MANY food lists online. I hope to be able to compile a list that combines them all, but that will take some time so it may be a while! There are several foods that are controversial as to whether it has an acid or alkaline effect on the body. Interestingly, it isn't how the food starts out, but how it ends up after digestion that makes the difference. For example, one of the best things you can do is squeeze a lemon into a glass of water every day. It doesn't seem to make sense since lemons are so acidic. However, after they are digested, they have what is called an alkaline "ash" so they are very good for you. One of the important things I have to keep reminding myself is that the diet doesn't have to be ALL alkaline. It should be 80% to start and then 60-75% to maintain. The maintenance # varies depending on where you read.
Being on the Zone diet, we are used to incorporating cheese, chicken and many other rather acidic foods. The Alkaline diet seems to be primarily fruits and veggies; it seems like it may be a challenge to get the protein in. However, I'm hopeful and excited to get started on our journey. I'm also mourning what I consider at this point to be a loss of certain foods that I love. However, I hope that we are able to make it work so that we love the food and don't feel deprived. It won't happen overnight, it will be a process. We still have lots of acidic forming food in our kitchen that we will be working through as we transition to an alkaline diet. I'm also a little stressed about getting Kira onboard...but she's not even onboard now, if I'm realy honest. I so desperately want her to learn and DESIRE healthy diet habits so she can avoid the weight and health issues that Carlos and I have faced.
Subscribe to:
Posts (Atom)